1. Select a red colour and select the tool brush with an opacity of about 40%. Draw the lines of where you want the scar to be.
2. Double click and on the layer of the scar and select >bevel and emboss. have a look at the depth and soften tool to decide how you want your scar to be.
3. Go to the brush tool and colour over the scar. Then change the mode to > colour burn.
4. Use the rubber tool to rub out any red colour that you do not want.
5. Your image should now look like this.
Thursday, 13 February 2014
Sunday, 9 February 2014
How to make a image be painted on someones face using Photo Shop.
1. Select the image you want and also drag the picture that you want to be painted on the persons face.
2. Change the opacity of the top picture to about 45%.
Use the Eraser tool to erase any of the top picture that you do not want on the person.
3. Change the mode to > Linear Burn.
4. Your final image should look like this.
2. Change the opacity of the top picture to about 45%.
Use the Eraser tool to erase any of the top picture that you do not want on the person.
3. Change the mode to > Linear Burn.
4. Your final image should look like this.
Selfies- Lecture notes
Selfies- A brief History
2005:
The
term
"selfie"
is first used by Richard Krause in a "how-to" photography guide.
Feb
2007: A user
of the photo-sharing site Flickr creates a group called
"selfie
shots", defining selfie
as: "A photograph of oneself in an arm-extended posture.”
June
2010: Apple
releases
the iPhone 4 featuring a front-facing
camera, allows users to frame their self-portraits.
Oct
2010: Instagram
is
launched, reaching more than 100 million active users by April 2012.
June
2012 : Selfie
joins
the OED's watchlist
of words for possible inclusion.
Dec
2012: Selfie
appears
in Time magazine's top buzzwords of 2012. "Selfies are often snapped at
odd angles with smartphones and include part of the photographer's arm,"
Jan
2013: Obamas'
daughters, Malia
and Sasha, are pictured taking a selfie
at their father's presidential inauguration.
March
2013: The Daily
Mail publishes its first moral panic piece about selfies,
headlined: "The craze for pouting pictures I fear my daughters will end up
regretting." The writer adds: "It's as though a whole generation has
lost the ability to smile naturally.”
Immersion and Simulation- Lecture notes
Immersion:is a metaphoric use of the experience of submersion applied to representation, fiction or simulation. The term is widely used for describing partial or complete suspension of disbelief enabling action or reaction to stimulations encountered in a virtual or artistic environment.
Simulation: An assumption or imitation of a particular appearance or form; counterfeit; sham.
The representation of the behavior or characteristics of one system through the use of another system, especially a computer program designed for the purpose.
Elements enhancing immersion
-Coherent
narrative plot, consistency, unity
-Causality
-Presentation
(e.g.
twists that make the story more interesting)
-Inclusion
of anthropomorphic beings (facial expressions, judgments, emotions encourage
viewer’s/reader’s identification)
-Atmosphere
and style (operate in a referential way)
Representationality:
‘realism’, increased size of screen, detail, Dolby
surround sound, vibrant colours, SFX to attract
attention
Degrees of immersion
No immersion
(non-communicative work, no engagement/access)
Partial
immersion (reading, engaging with a narrative, belief systems)
Total
Immersion (dreams, madness, reality)
Saturday, 8 February 2014
How to create a skull face on Photo Shop.
1. Make a new layer and press Ctrl Shift U.
2. Press Ctrl I.
3. Go to the skull image and press V and drag onto the image of the person. Press Ctrl T to adjust the skull to the face. Lower to opacity of the skull to 40%.
4. Go to the eraser tool and erase any unwanted areas of the skull on the face.
5. Your image should now look like this.
2. Press Ctrl I.
3. Go to the skull image and press V and drag onto the image of the person. Press Ctrl T to adjust the skull to the face. Lower to opacity of the skull to 40%.
4. Go to the eraser tool and erase any unwanted areas of the skull on the face.
5. Your image should now look like this.
Friday, 7 February 2014
How to create a stitched mouth on Photo Shop.
1. Duplicate layer.
2. Select > patch tool.
3. Trace over the mouth and then place the mouse over the cheek of the girl so that the mouth is completely removed.
4. Change the mode to multiply.
5. Select the soft brush and select a brown tone colour. Draw a line in the mouth area.
6. Change the mode to multiply.
7. Select the soft brush and create the stitches in the mouth.
8. Change mode to multiply.
Your final image should look like this.
2. Select > patch tool.
3. Trace over the mouth and then place the mouse over the cheek of the girl so that the mouth is completely removed.
4. Change the mode to multiply.
5. Select the soft brush and select a brown tone colour. Draw a line in the mouth area.
6. Change the mode to multiply.
7. Select the soft brush and create the stitches in the mouth.
8. Change mode to multiply.
Your final image should look like this.
Wednesday, 5 February 2014
Group Production Logo

Group Production Logo.
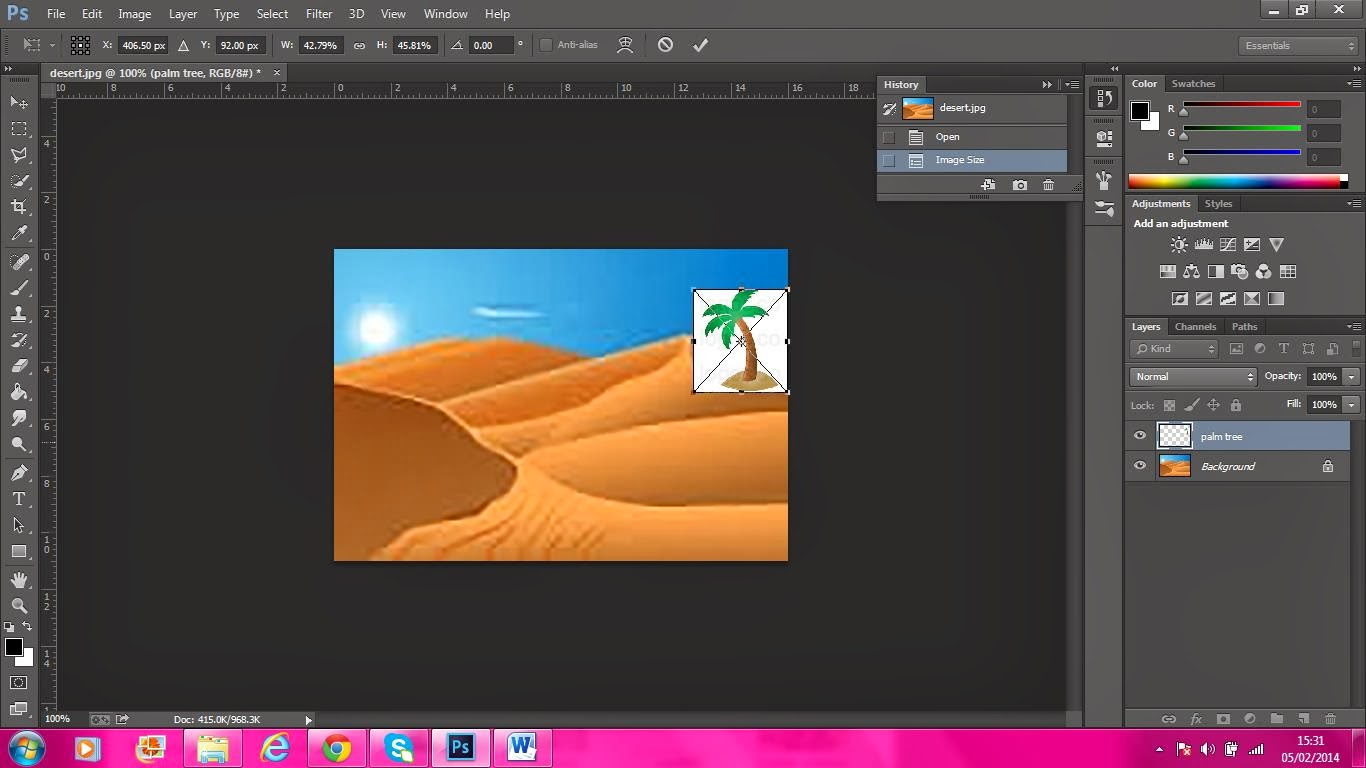
1. I selected an image of a desert and also a palm tree. I placed the palm tree where i wanted it to be in my Logo.
2. I used the quick selection tool to trace over the sand dunes. Once i did this i used the paint bucket tool to add colour to the sand dunes.
3. I also used the quick selection tool to outline the sand dunes. I also used the the paint bucket tool to fill them in with colour.
4. I selected the palm tree layer then traced over it using the quick selection tool and using the paint bucket tool to colour it in.
5. I then added the text in and selected the colour and type of text that i wanted.
Subscribe to:
Posts (Atom)